Mineral Wool Insulation Installation: What Should You Know?
When planning an insulation upgrade, it’s easy to get lost in technical detail and installation tips. Choosing the right approach saves you headaches and costly fixes.
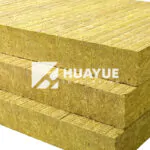
Mineral wool insulation is typically installed by fitting batts or boards snugly into wall cavities, floors, or ceilings, without compression. It does not settle over time and maintains thermal performance when properly secured.

Installing mineral wool insulation looks straightforward, but small missteps can become long-term headaches. Close attention to fit, moisture control, and secure mounting makes all the difference. I learned early on that getting installation technique right means fewer callbacks and better results for energy savings and comfort. Let’s look closer at each critical detail.
How is mineral wool insulation installed?
Most people struggle with keeping mineral wool snug between studs, afraid it will sag or leave gaps. Insulation only works well when it covers evenly, fills spaces tightly, and avoids compression.
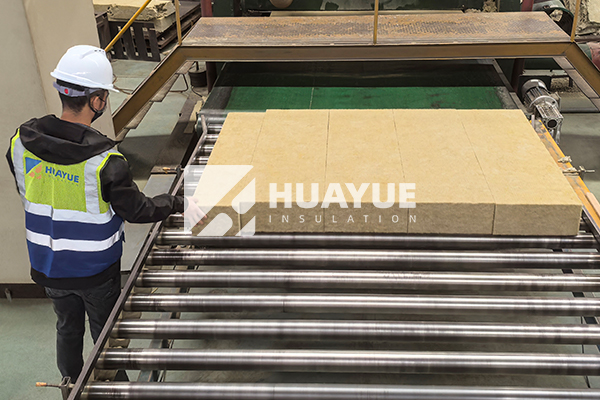
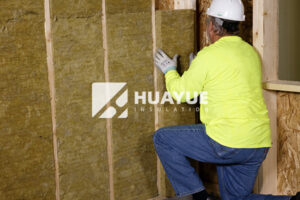
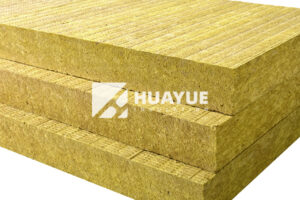
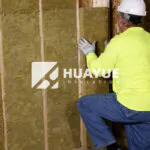
Mineral wool insulation is installed by pressing batts or rigid boards tightly into tall wall cavities, ceilings, or floors. Avoid compressing the material, and trim pieces to fit awkward spaces. This ensures full contact for best thermal and acoustic performance.
Let’s break down the installation steps. Start by measuring every cavity and cut each piece so it fits without force. Gaps around insulation will allow heat or sound to pass through the wall. If pieces are too big, they lose their fluffiness and resist less heat. I always remind myself not to over-pack insulation or leave spaces. If you have electrical wires in the wall, split the batts and fit them around. In ceilings or floors, mineral wool can also be laid down or supported by mesh if needed.
Here’s a handy table for the process:
| Step | Action |
|---|---|
| Measure cavity size | Match batts/boards to exact measurements |
| Cut insulation | Trim to fit without gaps or squeezing |
| Place insulation | Press snug into space, no compression |
| Address obstacles | Notch pieces for wires or pipes |
| Support insulation | Use mesh/net for ceilings if required |
I stick with these steps every time to ensure tight seals and reliable insulation results.
Do you need an air gap with mineral wool insulation?
Many ask about air gaps, fearing moisture and poor performance if they get it wrong. Not knowing the role of air space can cause mold or reduce insulation value over time.
You do not need an air gap for mineral wool in most wall assemblies. Mineral wool’s structure allows vapor to pass and resists moisture buildup, so tight-fitting installation against the substrate works best.
Why is this important? Mineral wool fibers are open and do not trap moisture. When installed directly against wall or roof surfaces, they maintain their properties. An air gap can be useful if you need ventilation in certain roof assemblies, but in standard walls or floors, it is not required. Leaving a gap might even harm performance because it lets cold or damp air travel freely, which defeats the purpose of insulation.
Here is a comparison table for reference:
| Installation Location | Air Gap Needed? | Reason |
|---|---|---|
| Wood stud walls | No | Tight fit blocks heat transfer |
| Concrete walls | No | Direct contact maximizes insulation value |
| Flat roofs | Sometimes | Only for ventilation needs |
| Floors | No | Place directly for best sound/thermal |
The lesson: Trust mineral wool’s design and keep your fit tight. Avoid unnecessary air space unless recommended by local building codes or roof design needs.
Do I need a vapor barrier with mineral wool insulation?
Vapor barriers confuse a lot of installers. Too much or too little control can trigger moisture problems like mold or rot. Choosing the right approach avoids expensive damage.
Mineral wool is naturally vapor permeable, so in most climates and building assemblies, a vapor barrier is not necessary. Only add a vapor barrier if local codes or humidity conditions demand extra moisture control.
Moisture moves through walls, especially where warm meets cold. Mineral wool lets vapor pass, so trapped wetness doesn’t accumulate. However, if you build in a cold climate or have high interior humidity (like kitchens or bathrooms), a vapor barrier on the warm side of the wall sometimes becomes important. Local building codes help guide this decision.
| Wall Location | Vapor Barrier Recommended? | Considerations |
|---|---|---|
| Interior partition walls | No | Dry, low humidity, no vapor drive |
| Exterior wall in temperate climate | No | Mineral wool allows drying |
| Exterior wall in cold climate | Yes | Stops vapor flow from warm side |
| High humidity rooms | Yes (if required) | Prevents interior moisture migration |
Always check codes before skipping or adding a vapor barrier. I make it a habit to confirm building requirements to avoid moisture trouble down the road.
How to hold rock wool insulation in place?
Getting insulation to stay put can be tricky, especially overhead. If batts sag, shift, or fall, heat leaks and cold spots appear. Securing mineral wool means lasting results.
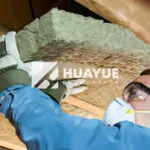
Rock wool insulation can be held in place by friction fitting within framing, support mesh or netting in ceilings, mechanical fasteners for boards, or wire systems for large applications.
Holding mineral wool insulation in walls or floors relies on friction. Batts should fit tightly, but not so much that they compress. In ceilings or roofs, wire mesh, netting, or support rods help hold insulation overhead. For rigid board mineral wool, fasteners such as insulation hangers or special washers help keep panels flat and secure. In industrial or tank applications, extra support may be needed due to vibrations or large spans.
| Installation Area | Attachment Method | Notes |
|---|---|---|
| Wall cavity | Friction fit | Trim batts for snug fit |
| Ceiling/Floor | Mesh/Netting | Stretch mesh under insulation |
| Roof panels | Mechanical fasteners | Use washers or insulation hangers |
| Tank surfaces | Wire or rod systems | Extra support for large surfaces |
Attention to secure fitting upfront keeps insulation where you want it and stops energy losses.
Conclusion
Done right, mineral wool insulation installation is simple and effective. Tight fits, moisture awareness, and secure mounting deliver long-term results.
You may also be interested in:

Ready to Get Started?
Get in touch with our experts for personalized solutions tailored to your needs.
Get Free QuoteLatest Articles


Let's Work Together
Ready to take your business to the next level? Get in touch with our team of experts and let's discuss how we can help you achieve your goals.
Get Free Solutions