How to install fiberglass insulation for maximum energy efficiency and safety?
Old insulation can let heat escape, moisture build up, and noise travel. You need a reliable, cost-effective way to keep your space comfortable all year.
Fiberglass insulation installation is a straightforward process. Cut batts or rolls to fit snugly between studs, place the insulation with the correct facing direction, and secure it to prevent gaps. Proper installation improves energy efficiency, prevents moisture issues, and boosts comfort.
Getting insulation right starts with good preparation. I plan material needs, check wall cavities, and consider local codes for safety and best results. With simple tools and careful technique, anyone can achieve professional-grade insulation. Let’s dive deeper into some of the most common questions about installing fiberglass insulation.
Can you install fiberglass insulation yourself?
Installing fiberglass insulation might look intimidating at first. Yet, with some simple skills and safety precautions, many homeowners can do it themselves.
Yes, you can install fiberglass insulation yourself. Wear safety gear, measure accurately, and use basic hand tools. Place insulation snugly in stud spaces, and avoid compressing the material. Follow local guidelines for best results.
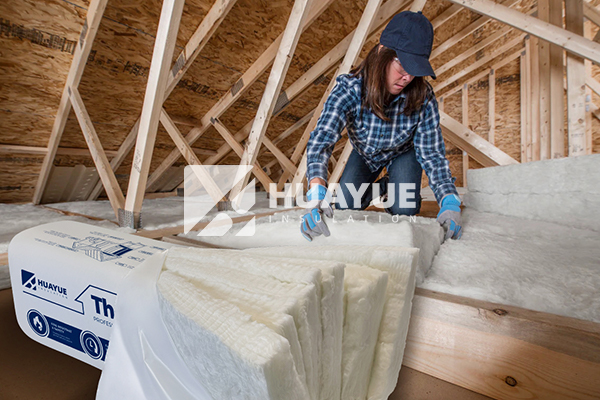
I always begin by assessing the area where I need insulation. I measure all the spaces between the framing studs. I choose the correct R-value for my climate and building use. For most homes, standard batts and rolls work best. Safety gear is essential. Working with fiberglass requires gloves, a long-sleeve shirt, goggles, and a dust mask. The tiny fibers can cause irritation if they contact skin or eyes.
Installation steps are simple. I cut each piece to fit tightly, then push the insulation gently into place. I avoid compressing the material because tight packing can lower its insulation value. I check each section for gaps, which can lead to drafts and poor energy performance. I ensure wiring and electrical boxes have room, so the insulation fits safely around them. With attention to detail and safety, DIY installation gives long-lasting benefits at a manageable cost.
| Step | Materials Needed | Safety Tips |
|---|---|---|
| Measure & Cut | Tape measure, utility knife | Wear gloves, goggles, mask |
| Fit Insulation | Batts or rolls | Avoid compressing batts |
| Check for Gaps | Flashlight | Seal around electrical boxes |
| Finish Edges | Stapler or tape | Work gently, avoid tearing |
Which side of fiberglass insulation faces out?
If you install insulation the wrong way, it won’t block moisture properly. This can lead to mold, rot, and lost efficiency.
The vapor barrier side of the insulation should face the warm side of the room—the interior in most climates. This helps stop moisture from entering the insulation and building structure.
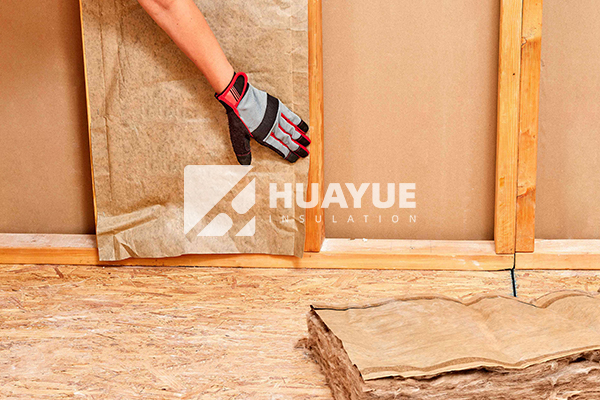
I always check the insulation’s facing before installing. Most batts have a vapor barrier on one side, called Kraft facing. This barrier should always face indoors in a heated space. In colder climates, I install the facing toward the living area to block moisture from traveling into the insulation from inside. In warm or humid regions, the direction may vary, so I check local codes.
Getting this right is critical. If the vapor barrier faces out, moisture from the inside air can get trapped in the wall. Over time, this may cause wood rot or mold growth. I lightly tack or staple the facing, but I never create holes or compress it too much. I never leave the vapor barrier exposed unless required by building codes—usually, it’s covered by drywall or paneling for safety and fire protection.
| Climate Type | Vapor Barrier Direction | Reason |
|---|---|---|
| Cold/Temperate | Faces room interior | Stop moisture from inside air |
| Warm/Humid | Varies by region | Consult local codes |
Should fiberglass insulation be stapled? How do you hold fiberglass insulation in place?
I don’t want the insulation to sag or bunch up over time. It needs to stay in place to keep the building efficient and safe.
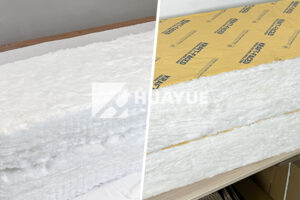
Staple faced insulation along the edges to hold it firmly. For unfaced batts, friction fit them between studs. Use support wires or netting for ceilings or overhead spaces to prevent sagging.
Correct placement is important. For faced insulation, I staple the paper flange to the sides of the studs, about every 8 inches. That holds the insulation in place while allowing the sheetrock to fit smoothly on top. I avoid stapling directly through the insulation, which can cause it to tear and reduce its effectiveness. In ceilings and underfloor areas, I install support wires, mesh, or even twine to keep unfaced batts from shifting or dropping.
Some jobs use blown-in fiberglass, and then netting or fabric holds the insulation in cavity spaces until wallboard goes up. I regularly check for gaps or uneven spots as I work. If I see sagging, I add more staples or supports. Keeping each batt secured and fluffy ensures maximum thermal performance for years.
| Type of Insulation | Support Method | Tools Needed |
|---|---|---|
| Faced Batts | Staple edges/flanges | Stapler, staples |
| Unfaced Batts | Friction fit, support wires | Support wire, mesh |
| Blown-in | Netting, fabric | Stapler, mesh |
Conclusion
Proper installation of fiberglass insulation requires care in placement, correct facing direction, and secure fastening for lasting energy efficiency and safety.
You may also be interested in:


Ready to Get Started?
Get in touch with our experts for personalized solutions tailored to your needs.
Get Free QuoteLatest Articles


Should B2B Buyers Choose Mineral Wool Insulation?
Mar 31, 2026

Is Rock Wool a Good Choice for Acoustic Insulation?
Mar 30, 2026
Rockwool Insulation for Roof: Best Practices (2026)
Mar 27, 2026
Let's Work Together
Ready to take your business to the next level? Get in touch with our team of experts and let's discuss how we can help you achieve your goals.
Get Free Solutions