How do you install ROCK WOOL insulation the right way?
Many people struggle with ROCK WOOL installation, risking poor performance and wasted effort. You want lasting results and easy installation, without headaches or hassle.
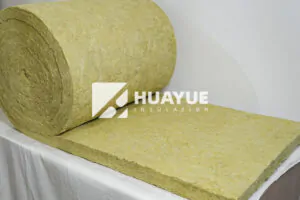
To install ROCK WOOL insulation properly, measure, cut, and fit the batts or boards snugly between studs or joists. Avoid compressing the material. Use supports such as wires or netting, but never leave gaps.
Correct installation ensures reliable thermal performance and helps the insulation work as designed. If you want your building to save energy, stay safe, and be comfortable all year, don’t skip the details. In the next sections, I’ll break down frequent questions and share practical installation tips that help you get long-lasting results.
How to properly install ROCK WOOL insulation?
Many DIYers and professionals worry about getting ROCK WOOL insulation fitted without gaps or sagging. Poor installation almost always leads to bad results and maintenance headaches.
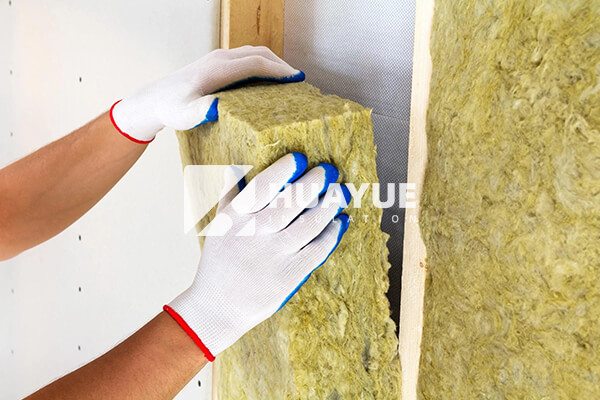
You must first measure your wall or ceiling cavities and cut ROCK WOOL to fit snugly. Don’t compress it—ROCK WOOL works best when it keeps its thickness. Fit the batts or boards gently but tightly in place.
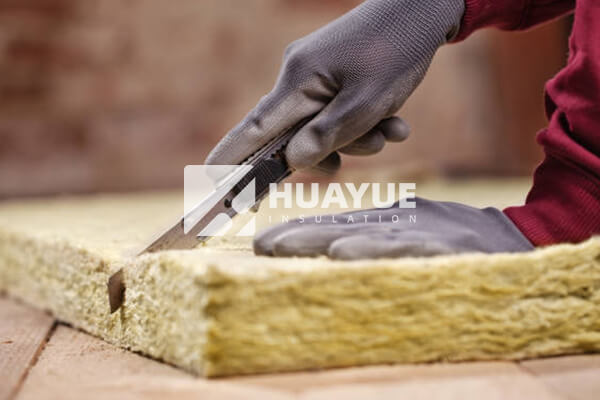
Installing ROCK WOOL insulation begins with accurate measuring. I always measure the cavity width, depth, and height with a sturdy ruler or measuring tape. Next, I lay the ROCK WOOL on a flat surface and mark the cuts. A serrated insulation knife helps keep clean edges that fit snugly. After cutting, I press the batts lightly into each cavity.
Keeping the material uncompressed is crucial. The tiny gaps in ROCK WOOL trap air and give it insulating power. If you squeeze the product too much, you lose performance. I press it in so it just holds to the wall or ceiling edges without bulging. At corners or junctions, I gently trim small sections to get a tight seal.
Installers sometimes use netting or wiring across ceiling joists to keep ROCK WOOL from falling. Walls usually need nothing extra if the insulation fits tightly. If there are any large gaps or irregularities you cannot fill, add support or cut extra pieces to plug those spaces. Avoid using adhesives or tapes that might break down over time. Installation that pays close attention to fit, depth, and edge sealing gives the best results every time.
How to hold ROCK WOOL in place?
People often worry that ROCK WOOL will sag or fall out over time, especially in ceilings or old walls. Good support keeps it where it belongs, ensuring lasting comfort and energy savings.
Use support wires, netting, friction fits, or specialized fasteners to hold ROCK WOOL securely. Placement depends on orientation, cavity width, and building use.
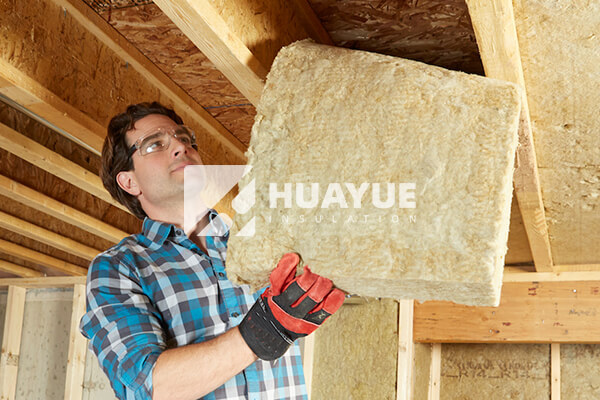
Holding ROCK WOOL dependably lets the insulation do its job for years. I often use friction-fitting as the main method. ROCK WOOL batts fit snugly between wall studs, so they stay in place naturally. In ceilings—especially overhead—support wires or netting work best. Thin insulation support wires stretch across joists every 30–50 cm to hold the batts up. Plastic netting works well in large ceiling areas, since it’s lightweight but strong.
Vertical wall spaces might benefit from batt stops at the top or bottom of the cavity. These are little wooden strips or metal plates. They help prevent movement if there’s vibration or settling in the building. For specialty jobs or advanced fire-rated installations, manufacturers offer proprietary clips and holders.
Don’t use adhesives. Over time, sticky materials may lose their grip or break down with heat or moisture. Always rely on mechanical supports or friction fit for permanent hold. For tight corners, small gaps, or irregular areas, cut extra ROCK WOOL pieces and wedge them in to keep things tight, with no space for air leaks. Steady support extends the insulation’s life and makes maintenance easier in the future.
| Support Method | Application Area | Key Benefit | Typical Spacing |
|---|---|---|---|
| Friction Fit | Walls | Simple, tight | N/A |
| Support Wires | Ceilings | Reliable, minimal effort | 30–50 cm |
| Netting | Large ceiling areas | Covers gaps, easy upkeep | Variable |
| Batt Stops | Wall base/top | Prevents shifting | Cavity ends |
| Clips/Holders | Specialized areas | Extra security | Manufacturer spec |
Does it matter which way ROCK WOOL is installed?
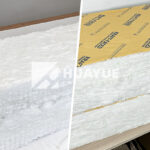
Builders often ask, “Does direction matter for ROCK WOOL insulation?” Some products have different surfaces or slight facing layers. Everyone wants maximum insulating power and fire resistance.
For most applications, ROCK WOOL is symmetrical—you can place it either way, unless there’s a special vapor barrier or facing layer. Check product details before installing.
Direction is important when insulation materials have special layers. Most ROCK WOOL products, especially plain or unfaced batts, work the same regardless of direction. If you have faced ROCK WOOL, the facing side (such as foil or vapor barrier) should point in the direction recommended by the manufacturer. For example, foil facing usually faces the warm side (toward the room interior).
If you install plain ROCK WOOL, just fit it tightly into the cavity with edges touching the framing. No need to orient it in a special direction.
Make sure that any faced insulation is installed with the correct side toward living spaces or the side subject to vapor drive. This prevents moisture problems. Always read the product guidelines for facing orientation.
| ROCK WOOL Type | Facing | Direction Matters? | Notes |
|---|---|---|---|
| Plain Batts/Boards | None | No | Place snugly; no orientation needed |
| Foil-Faced | Foil | Yes | Face toward warm side (indoors) |
| Vapor Barrier Faced | Plastic/film | Yes | Face toward vapor pressure source |
Does ROCK WOOL need to be stapled?
Many installers want to know if staples are necessary for strong ROCK WOOL installation. They also worry about damaging the material or causing gaps.
No, you do not need to staple ROCK WOOL insulation. Proper sizing and friction fit usually hold it in place. Use staples only for facings or vapor barriers when specified.
If I install ROCK WOOL batts, I always check for a tight fit in the cavity. If it’s secured in the wall or ceiling by friction, it needs no staples or adhesives. Sometimes, faced insulation (products with paper or foil vapor barriers) needs stapling only to attach the facing—not the ROCK WOOL itself. Staple the edge of the facing directly to framing, not through the insulation.
Stapling through ROCK WOOL can compress the fibers. That reduces insulation value and can create air gaps. If the product doesn’t call for stapling, avoid it entirely. Use wiring, netting, or batt stops for extra support, as described above.
Always follow the manufacturer’s installation guide. Manufacturers design facings to work with staples only on the surface layer. Keep your installation tools away from the insulation core unless clearly required. That way, you protect performance and increase durability.
| Situation | Staples Needed? | Alternative Support |
|---|---|---|
| Unfaced ROCK WOOL | No | Friction fit, wires |
| Foil or Faced ROCK WOOL | Yes (for facing) | Staple facing only |
| Ceiling installation | No | Wires, netting, batt stops |
| Irregular gaps/edges | No | Extra ROCK WOOL pieces |
Conclusion
Proper ROCK WOOL installation means measuring, cutting, fitting snugly, and using the right supports—not compressing, stapling, or worrying about orientation.
You may also be interested in:

Ready to Get Started?
Get in touch with our experts for personalized solutions tailored to your needs.
Get Free QuoteLatest Articles

What is R19 Kraft Fiberglass Insulation Batt?
Mar 20, 2026
What is High Density Mineral Wool?
Mar 20, 2026
Is Glass Wool the Best Choice for Sound Insulation?
Mar 19, 2026
Let's Work Together
Ready to take your business to the next level? Get in touch with our team of experts and let's discuss how we can help you achieve your goals.
Get Free Solutions