# How do you install fiberglass insulation?
Adding fiberglass insulation to your building might seem hard, but the right steps make it simple and fast.
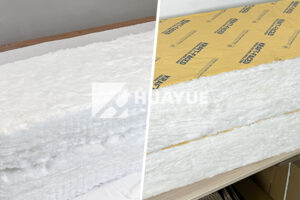
To install fiberglass insulation, wear protective gear, measure and cut batts or rolls carefully, fit them snugly between studs or joists, and avoid compressing the material to ensure top performance.
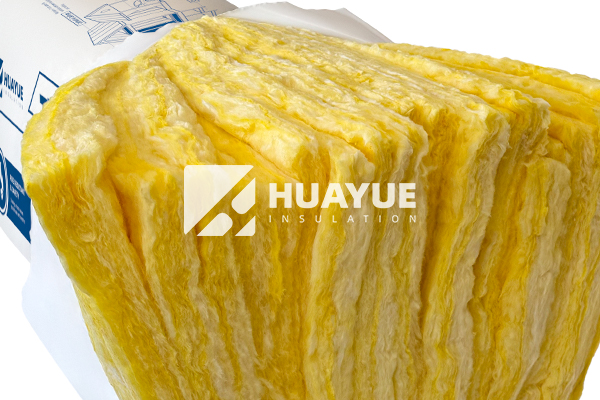
If you want your building to stay warm and lower energy bills, installing fiberglass insulation is one of the best investments you can make. Many people worry about doing it themselves, but even first-timers can achieve a great result with patience and attention. Let’s get into the basics, then break down each step and common questions so your installation goes off without a hitch.
What tools and safety equipment do you need for fiberglass insulation installation?
Many worry about the dangers of handling fiberglass. It can irritate your skin and eyes, so you must use the right equipment.
The tools and safety gear you need include gloves, goggles, a mask, a utility knife, a tape measure, and a staple gun. These keep you safe and ensure a smooth installation process.
Working with fiberglass materials means you must think first about your safety. Fiberglass is made from tiny glass fibers that can cause itching and discomfort if not handled properly. I remember my first project many years ago—my hands were red and itchy for days because I thought gloves were optional. That was a mistake. Always wear gloves that cover your wrists, a long-sleeved shirt, long pants, eye protection, and a dust mask or respirator. You should also have a sharp utility knife for cutting batts or rolls to fit. A tape measure ensures pieces are cut to the correct size, and a staple gun secures facing to studs. Have a straightedge or a board nearby for smooth and accurate cuts. In a nutshell, a little preparation will make your job more comfortable and safer. Here is a simple table for a quick checklist:
| Tool / Gear | Purpose |
|---|---|
| Gloves | Protect hands from fibers |
| Goggles | Armor eyes against dust/glass particles |
| Mask/Respirator | Prevents inhalation of fibers |
| Utility knife | Cuts insulation to fit |
| Measuring tape | Ensures correct size |
| Staple gun | Secures facing to studs/joists |
| Long-sleeved shirt | Full-arm protection |
How do you measure and cut fiberglass batts or rolls properly?
If insulation doesn’t fit right, it will not perform as expected and may leave cold and hot spots.
For the best results, always measure the space between framing members and cut each piece slightly wider so it fits snugly without gaps or compressed spots.
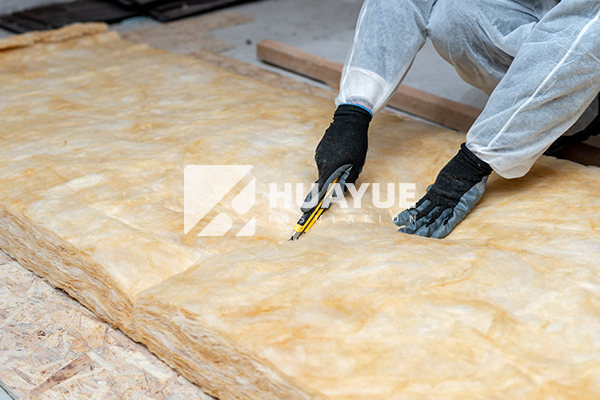
I see mistakes happen when people rush the measuring and cutting process. It only takes a small air gap or a piece of bunched insulation for heat to sneak through. Take your tape measure and check the height and width of each cavity—studs or joists are not always spaced perfectly. Mark cuts on the insulation with a marker and use a firm, straight edge like a piece of scrap wood. Draw the utility knife along the straight edge in several passes rather than trying to slice through the whole thickness at once. The insulation should be cut roughly a half-inch wider than the space, so it compresses just enough to stay put but remains fluffy. When insulation is packed too tightly or left loose, it loses much of its value. Secure batts with the facing side out. This step is crucial in areas where vapor barriers are recommended. Here’s a handy table to remember:
| Step | Tip |
|---|---|
| Measure space | Always double-check cavity dimensions |
| Mark batts | Use a straightedge for clean, straight cuts |
| Cut | Use a sharp knife, press gently |
| Fit | Let insulation expand to fill the space |
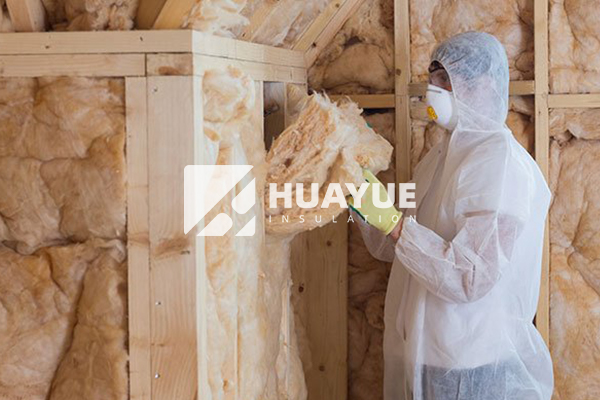
How do you install fiberglass insulation in walls and ceilings?
Some people think shoving batts in quickly will do, but proper technique makes a big difference.
To install in walls, fit the insulation gently between studs without gaps or overlapping layers. For ceilings, place batts or rolls between joists, supporting them as needed without compressing.
Many times, I have walked into projects where the insulation was crammed into place, and big heat losses showed up later during winter. The goal is a snug fit, never forced. Start at the top of the stud bay or joist and work down. Pin the insulation in place, allowing it to naturally fill the cavity. If there’s a faced side, point it toward the living space. Always cut around wires and pipes rather than stuffing behind or in front of them. For overhead work, you might need to staple the insulation to joist sides or support it with wire stays designed for ceilings. Do not sandwich insulation tight or let it sag away from the surface, as this creates weak points. Every project teaches the same lesson: attention to detail now keeps energy inside later. Use this basic process for reference:
| Area | Technique | Caution |
|---|---|---|
| Stud Walls | Pressure-fit insulation edge to edge | Avoid compression |
| Ceilings | Lay or staple batts between joists | Support if needed |
| Around Pipes | Cut notches; don’t shove behind obstacles | No air pockets |
How do you handle vapor barriers and facing with fiberglass insulation?
Choosing to use vapor barriers often confuses people. It is important for moisture management.
Install vapor barriers toward the warm-in-winter side (often the interior). Use faced insulation with the paper or foil towards the living space, or install a separate barrier if required.
It is sometimes easy to forget this step, especially if you are in a hurry. However, vapor barriers keep moisture from passing through the wall from inside to outside or vice versa, depending on your local climate. Excess moisture can cause mold growth or rot and reduce insulation effectiveness. Most residential installations use kraft-faced batts for walls, stapled with the facing toward the interior. In very wet or new construction areas, add a 6-mil plastic sheet as an additional barrier on the inner side after installing the insulation. Check local building codes for what is required because wrong placement can do more harm than good. For unfaced fiberglass batts, be sure to install a separate vapor barrier if it is recommended for your region. Below is a brief guide:
| Climate Zone | Facing Placement | Extra Barrier Needed? |
|---|---|---|
| Cold (heating dominant) | Facing to room/interior | Often yes |
| Warm (cooling dominant) | Facing to outside/exterior | Sometimes |
| Mixed/humid | Check code; may need both sides | Check code |
How do you clean up and check for errors after installation?
You may feel finished when the last batt goes up, but proper cleanup and a quick quality check help avoid future problems.
Always remove leftover insulation, vacuum all dust and fibers, double-check every cavity for full coverage, and inspect for gaps or compressed areas before closing walls.
After installation, I always walk through the site with a flashlight, looking at every stud bay and joist space closely. It is common to find a piece bunched up or an odd spot that did not get as much insulation as the rest. Use your hands (with gloves!) to smooth out any uneven parts and ensure every cavity is filled completely. Vacuum fibers from the work area so they do not irritate other workers. Bag and dispose of waste according to local guidelines. Finally, if installing in exterior walls, check your local building code’s inspection checklist before closing up the wall with drywall. Fixing small mistakes now will save trouble later.
| Cleanup Task | Reason |
|---|---|
| Remove scraps | Prevent hazards, ease inspection |
| Vacuum site | Reduce dust, irritation |
| Inspect cavities | Ensure coverage, no compression |
| Code compliance | Required for passed inspections |
Conclusion
Installing fiberglass insulation is a careful process. Pay attention to measurement, fitting, and safety and you will get solid energy savings for years.
You may also be interested in:

Ready to Get Started?
Get in touch with our experts for personalized solutions tailored to your needs.
Get Free QuoteLatest Articles


Should B2B Buyers Choose Mineral Wool Insulation?
Mar 31, 2026

Is Rock Wool a Good Choice for Acoustic Insulation?
Mar 30, 2026
Rockwool Insulation for Roof: Best Practices (2026)
Mar 27, 2026
Let's Work Together
Ready to take your business to the next level? Get in touch with our team of experts and let's discuss how we can help you achieve your goals.
Get Free Solutions